A Simple Guide to Enabling Ubuntu Pro via Ubuntu's Security Center
Introduction
With the release of Ubuntu 26.04 LTS, Canonical streamlined the system settings by removing the familiar Software & Updates utility from the default installation. Instead, all Ubuntu Pro configuration has been integrated into the Security Center app. This change aims to provide a cleaner, less cramped environment where each setting is accompanied by clear, concise explanations. The setup process is now more straightforward than ever—whether you’re a home user looking for free personal protection or an administrator managing a fleet of machines. This guide walks you through every step, from opening the app to verifying your subscription.

What You Need
- Ubuntu 26.04 LTS or a later version (the Security Center is included by default).
- Administrative privileges (you must be able to run commands with
sudoor have an account with admin rights). - An active internet connection to reach Canonical’s servers.
- An Ubuntu One account (free to create) or a token provided by Canonical for subscriptions. Personal accounts are free for up to five devices.
- Basic familiarity with system settings – no advanced technical skills required.
Step-by-Step Instructions
Step 1: Open the Security Center
Press the Super (Windows) key on your keyboard to open the Activities overview. Type “Security Center” in the search bar and click the application icon that appears. Alternatively, you can launch it from the system menu by clicking the shield-shaped icon in the top-right corner of your desktop (if enabled). The Security Center window will display a dashboard with various protection categories.
Step 2: Locate the Ubuntu Pro Section
Inside Security Center, look for a tab or section labeled Ubuntu Pro. In the latest version of Ubuntu 26.04 LTS, this entry is usually listed prominently on the left sidebar or as a tile on the main screen. Click on it to open the Pro settings panel. You’ll see an overview of your current subscription status, available updates, and configuration toggles.
Step 3: Sign In or Enter Your Token
To activate Ubuntu Pro, you need to link your device to either a personal account or a corporate subscription. Two methods are available:
- Sign in with Ubuntu One: Click the “Sign in” button and log in using your Ubuntu One credentials. This is the easiest route for personal users and automatically associates the machine with your free subscription (up to five devices). If you don’t have an account, you can create one right from the same window.
- Use a token: For business or enterprise users, a token may be provided by your administrator. Paste the token into the designated field and click “Activate.” This method is also helpful when you are managing multiple machines and want precise control over subscriptions.
Step 4: Toggle and Customize Settings
Once authenticated, you will see a range of options that mirror the old Software & Updates Pro tab. However, the new interface is less cramped and offers better spacing for descriptions. The key settings include:
- Security updates: Toggle this on to receive critical patches as soon as they are available.
- Extended Security Maintenance (ESM): Enable ESM for continued security coverage after the standard support period ends. This is especially important for LTS versions.
- Livepatch: Apply critical kernel patches without rebooting. Great for servers and workstations that need maximum uptime.
- Landscape: If your organization uses Canonical’s management tool, you can link this device to a Landscape server for fleet management.
Each toggle comes with a brief explanation directly below it, making it easy to understand what each feature does. Adjust these according to your needs; for most personal users, simply enabling all the default recommendations is sufficient.
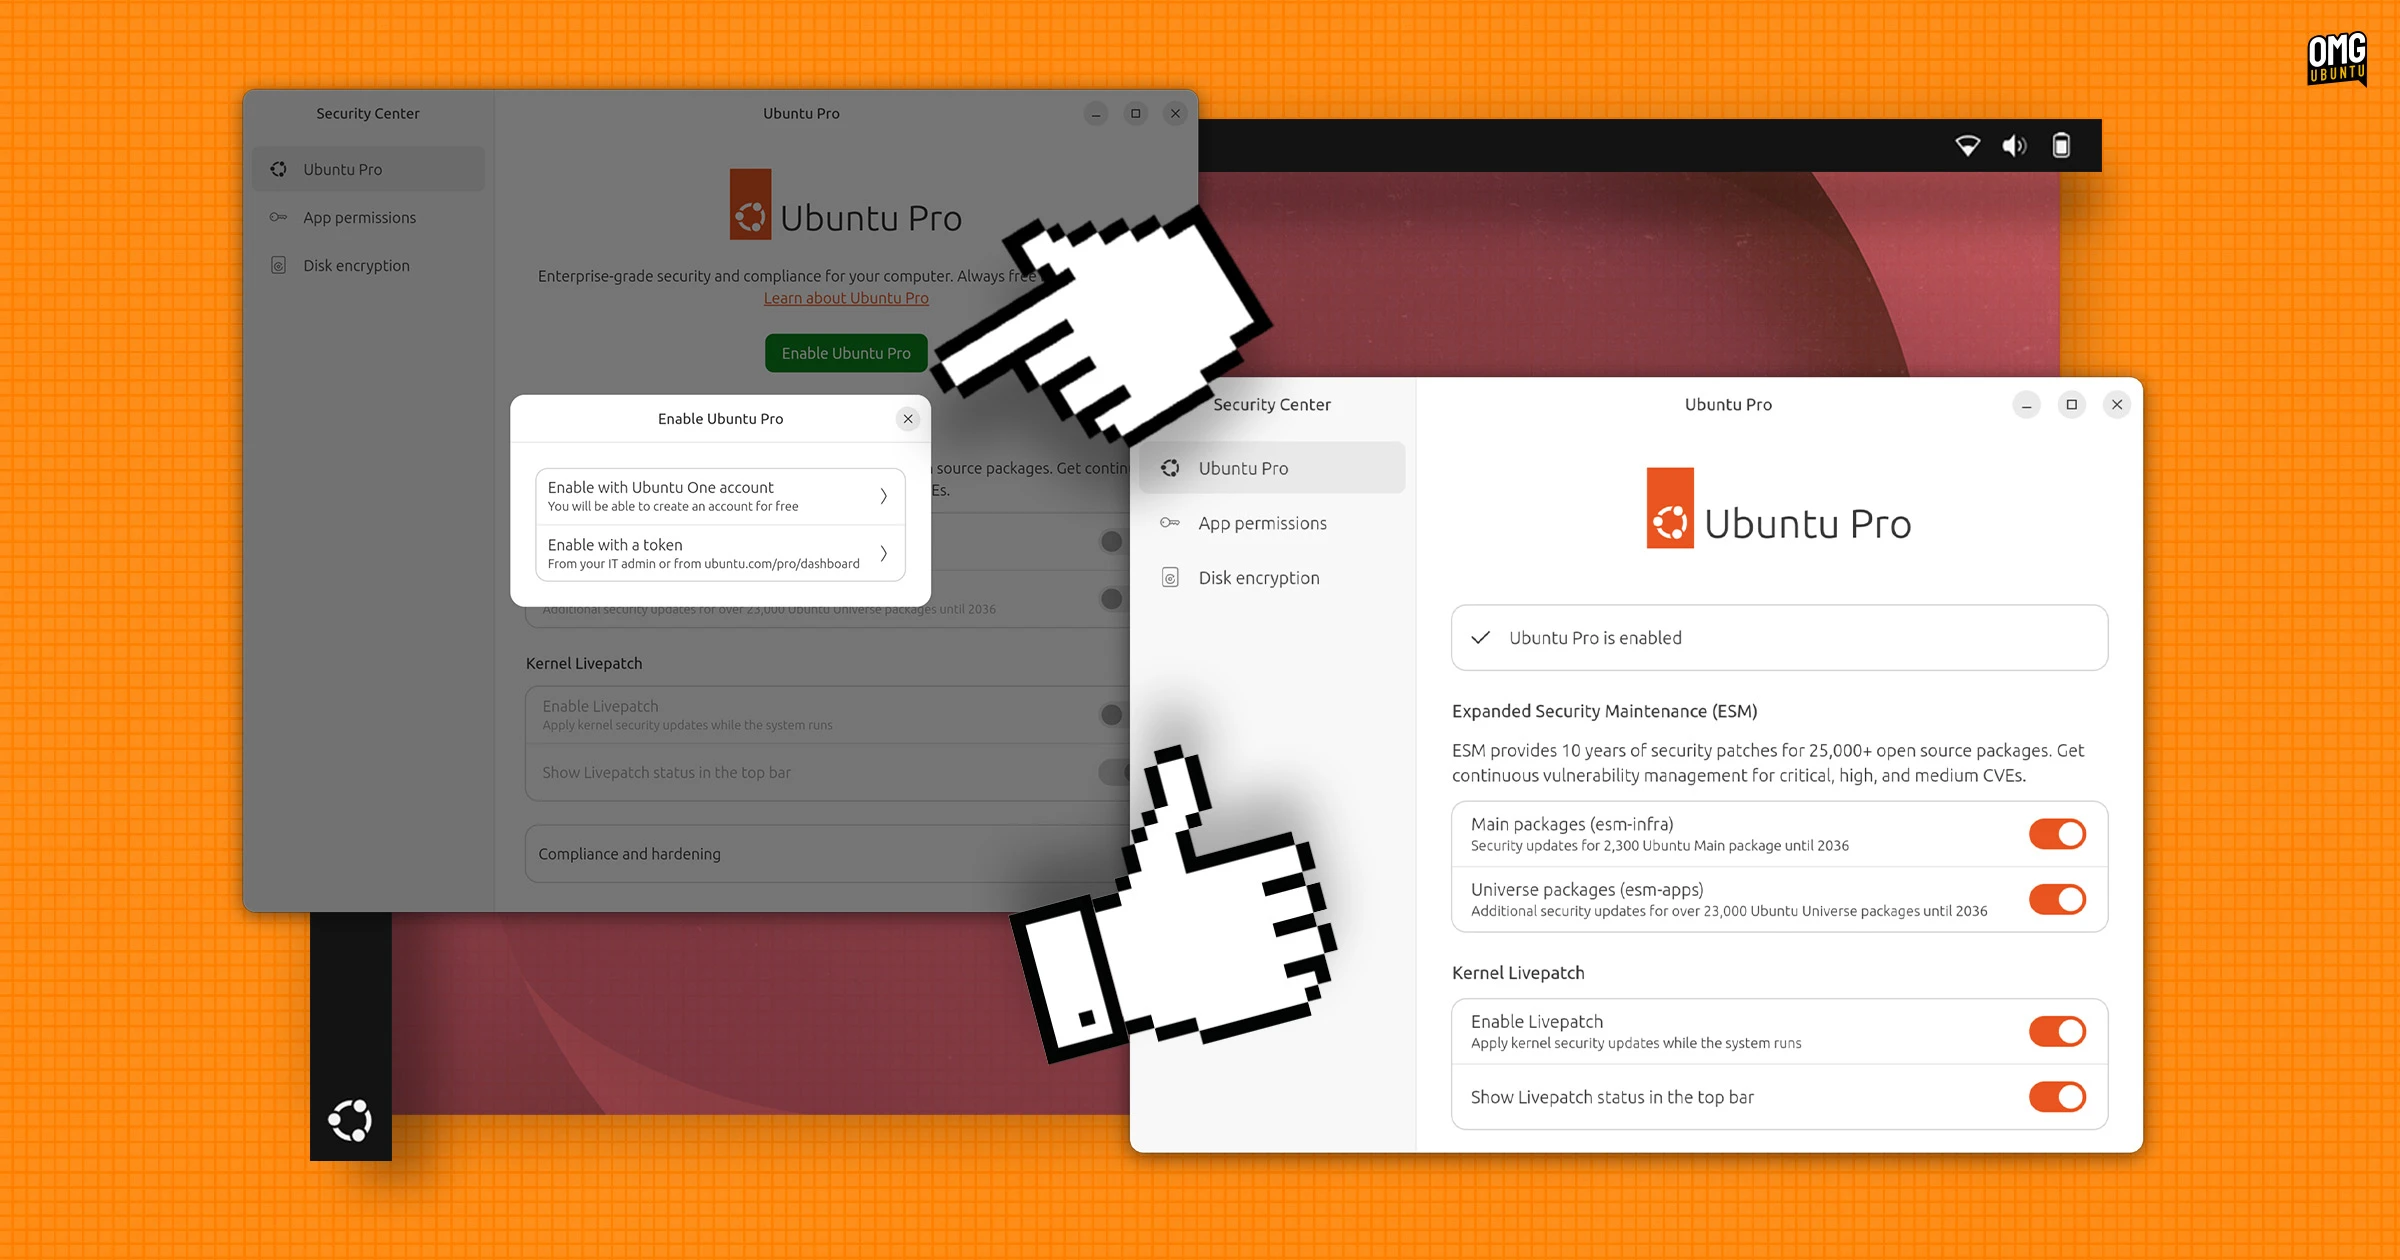
Step 5: Verify Activation
After configuring your preferences, return to the main Ubuntu Pro panel. You should now see a status message saying something like “Ubuntu Pro is active” or a green checkmark next to your subscription. For extra verification, open a terminal and run:
sudo pro statusThis command prints detailed information about your subscription, including expiration dates, attached services, and machine ID. If everything looks correct, your Ubuntu Pro setup is complete.
Tips for a Smooth Experience
- Double-check your token: If you’re using a token, ensure it is copied exactly—including any hyphens or capital letters. A single typo can cause activation to fail.
- Personal vs. Business: Remember that Ubuntu Pro is free for personal use on up to five machines. If you need more devices or are using it in a commercial environment, you must purchase a subscription from Canonical.
- Keep the Security Center updated: The Security Center app itself receives updates via the standard system updater. Keeping it current ensures you have the latest features and bug fixes.
- Use the command line for advanced tasks: While the GUI is great for basic setup, advanced users can manage subscriptions via the
procommand. For example,sudo pro attach <token>andsudo pro detachare useful for scripted deployments. - Troubleshooting: If you encounter a “Failed to connect” error, check your internet connection and ensure that Ubuntu’s repository servers are reachable. Sometimes a firewall or proxy may block the activation process.
- Enable Livepatch for zero‑downtime updates: If your system is mission‑critical, turning on Livepatch can save you from rebooting after kernel security patches.
Now you’re fully equipped to enable Ubuntu Pro through the Security Center with ease. The new, spacious layout and step‑by‑step prompts make the process almost intuitive. Enjoy the extended security coverage and peace of mind that comes with an active Ubuntu Pro subscription!
Related Articles
- 10 Key Insights Into Voice Interface Usability
- Astropad Workbench Giveaway: Win a Mac Mini for AI Agent Control – Questions Answered
- 10 Key Insights Into the Rural Guaranteed Minimum Income Initiative
- Stack Overflow Announces CEO Transition: Joel Spolsky Becomes Chairman
- Morrowind at 24: A Modathon Tribute and the Rise of Unlikely Heroes
- 5 Essential Insights into Swift System Metrics 1.0 for Process Monitoring
- Revive Your Old Google Home Mini as a Local Smart Home Hub with This $85 Open Hardware Board
- Samsung One UI 9 to Give Users Control Over Home Screen Search: 7 Key Insights