Build Your Own 18th-Century Mechanical Volcano: A Modern Maker's Guide
Introduction
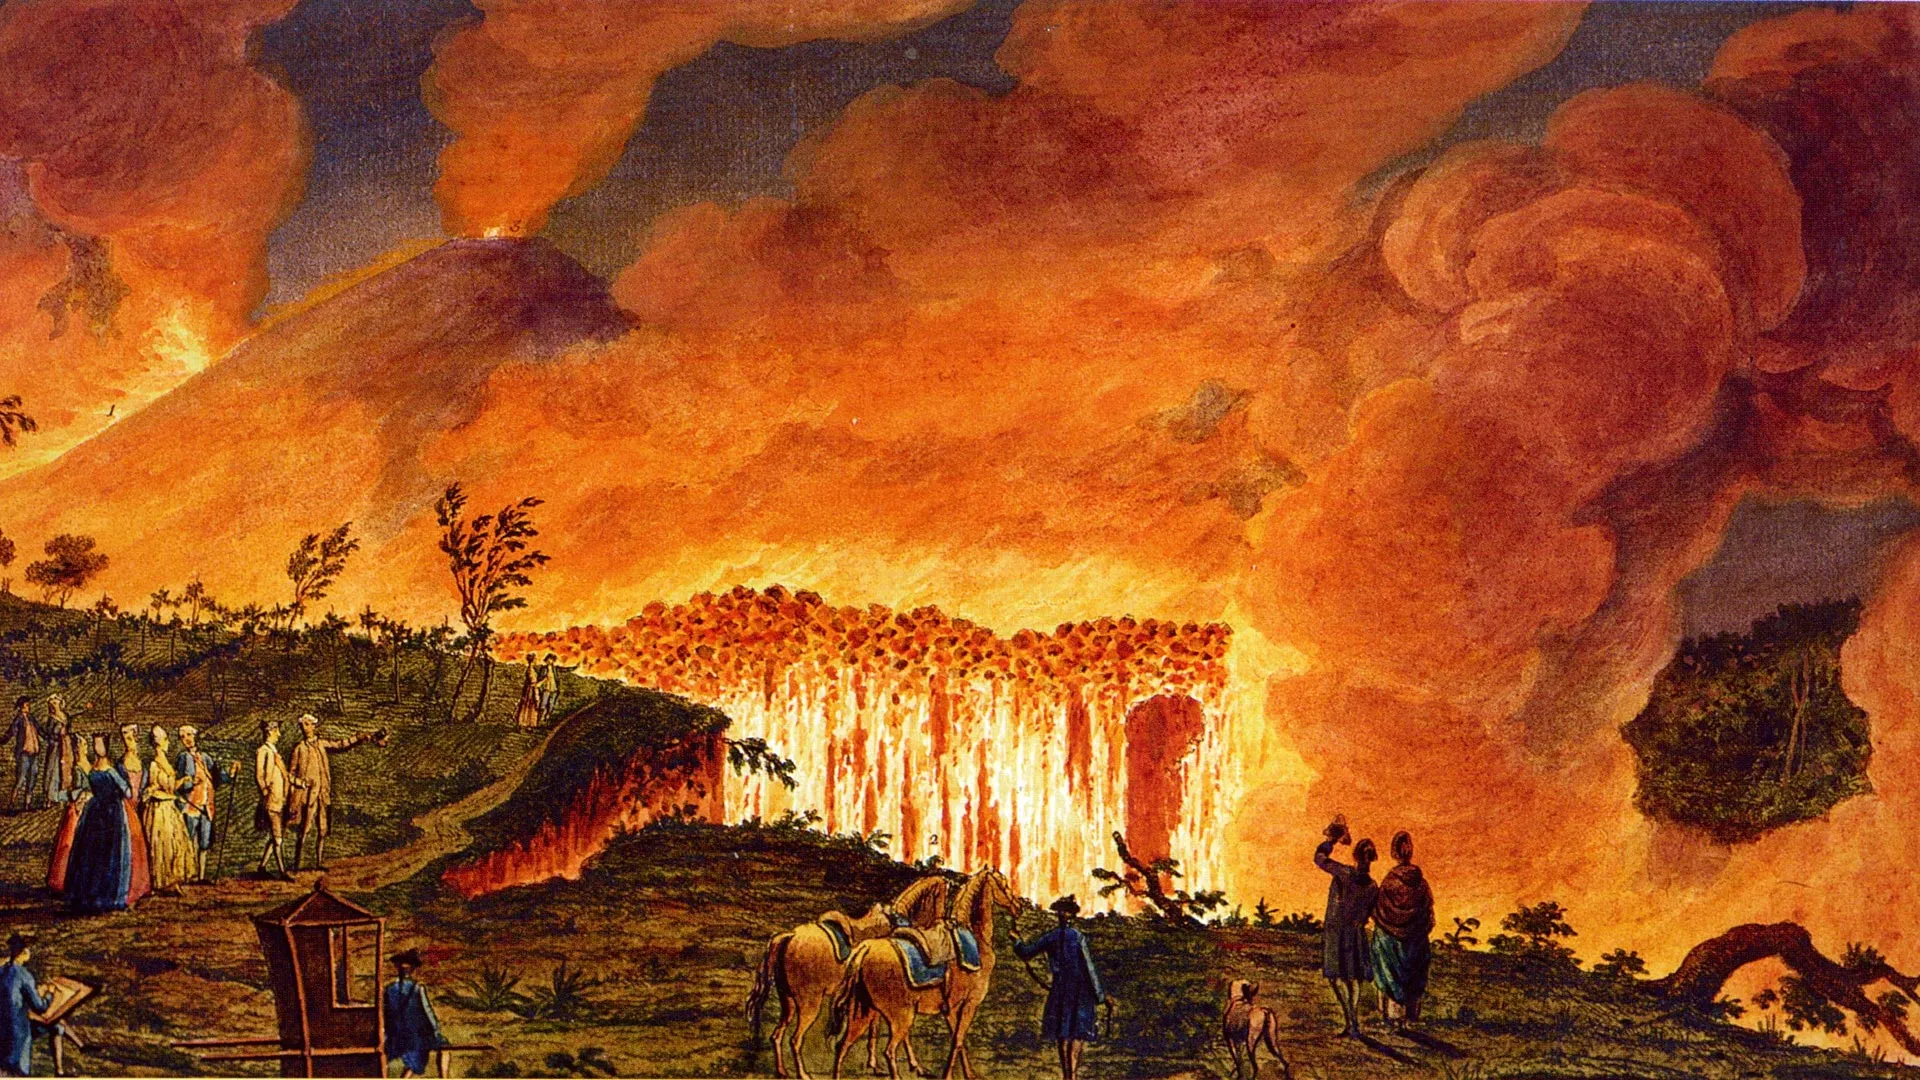
More than 250 years ago, volcanology enthusiast Sir William Hamilton sketched a remarkable mechanical volcano, intended to simulate the dramatic eruptions of Mount Vesuvius. This 18th-century vision—preserved in a watercolor and a detailed sketch—has now been brought roaring back to life by two University of Melbourne engineering students using modern LED lighting and electronic systems. In this guide, you'll learn how to recreate your own version of Hamilton's mechanical volcano, combining historical curiosity with contemporary maker techniques. Whether you're a history buff, a hobbyist, or a STEM educator, follow these steps to build a miniature eruption that wows audiences.
What You Need
- Research materials: Access to Sir William Hamilton's 18th-century watercolor and preserved sketch (available online via museum archives or academic databases)
- Volcano structure: Foam board, papier-mâché, or 3D-printed base components; cardboard or lightweight clay for the cone
- Lighting effects: LED strips (red, orange, yellow), addressable RGB LEDs with controller
- Electronic systems: Microcontroller (e.g., Arduino Uno or Raspberry Pi Pico), breadboard, jumper wires, resistors, button or sensor for triggering
- Simulation materials: Dry ice (or fog machine) for smoke effects; orange/red cellophane for glow; small fan or air pump to direct flow
- Tools: Hot glue gun, scissors, wire cutters, soldering iron (optional), paint and brushes for finishing
- Safety gear: Gloves, safety goggles, ventilation fan (for dry ice use)
Step-by-Step Guide
Step 1: Study the 1775 Hamilton Design
Begin by thoroughly examining the original watercolor and sketch that inspired the Melbourne students. Look for key details: the shape of the volcano, the location of vents, the color palette used in the painting (indicating lava flow areas), and any mechanical notes on the sketch. Write down the proportions—how tall is the cone relative to its base? Are there multiple craters? Understanding the 18th-century aesthetic will help you replicate the historical feel while adding modern effects.
Step 2: Gather Your Materials and Tools
Assemble everything listed in the What You Need section. For the volcano body, you can choose lightweight materials like foam board or cardboard for easy shaping; for a more durable version, consider 3D printing the main cone. The LEDs and microcontroller are the heart of the modern simulation—ensure you have compatible components (e.g., addressable LEDs that can produce a flowing lava effect). If you plan to use dry ice for smoke, source it from a local supplier on the day of demonstration.
Step 3: Construct the Volcano Body
Using your chosen material, build the volcano cone following Hamilton's proportions. A typical design is a truncated cone about 30-40 cm tall with a base diameter of 20-25 cm. Cut the foam board into a flattened cone template, then glue the edges. Add a hollow interior to house the electronic components. For realism, paint the exterior with earthy tones and include cracks where lava might flow. Create a central crater opening—this is where the main eruption effects will emerge. Optionally, add secondary vents on the sides.
Step 4: Install Lighting and Electronic Effects
Inside the volcano, attach LED strips along the interior walls and around the crater rim. Use the microcontroller to program a sequence: a slow pulsing glow that intensifies, then a rapid flicker to simulate an eruption. For a flowing lava effect, configure addressable LEDs to shift from red to yellow along a path. Wire a push button or a motion sensor to trigger the eruption. Power everything with a USB battery pack (5V) to keep it portable. Test the lights before sealing the body.
Step 5: Simulate the Eruptions
To produce the dramatic smoke and ash of an 18th-century eruption, place a small container of dry ice inside the crater (or use a fog machine). Add a fan to push the fog upward. Coordinate the fog output with the lighting sequence: as the LEDs glow brighter, the fan speeds up and more fog rises. If using dry ice, add hot water to accelerate sublimation—but do this just before a demonstration for maximum effect. Also, drape orange cellophane over the outer vents to mimic lava overflow when the lights are on.
Step 6: Test, Refine, and Present
Run through the entire sequence several times. Adjust the LED brightness, timing, and fog density until the result matches the historical watercolor's drama. Consider adding sound effects (recorded rumble) via a small speaker connected to the microcontroller. Once satisfied, present your mechanical volcano at a science fair, history museum exhibit, or maker event. Remember to explain the connection to Sir William Hamilton's original 1775 design—your audience will appreciate the blend of history and technology.
Tips for Success
- Research thoroughly: The more you understand Hamilton's original drawings, the more authentic your replica will be. Many 18th-century watercolors are available in digital archives.
- Start simple: If you're new to electronics, use a pre-programmed Arduino sketch for LED effects. Many online tutorials exist for lava lamp-style animations.
- Safety first: Dry ice can cause frostbite—always handle with gloves and ensure good ventilation. Do not seal dry ice in a closed container.
- Scale matters: For a tabletop demonstration, keep the volcano under 50 cm. For larger exhibits, scale up proportionally and reinforce the structure.
- Document your build: Take photos and notes throughout the process. You may inspire others—just as the Melbourne students were inspired by Hamilton.
- Test in low light: The glowing effects are most impressive in dim environments. If presenting in a bright room, consider using more powerful LEDs or adding a shield.
Now it's your turn to make history erupt. With these steps, you can recreate the 18th-century mechanical volcano that roared to life 250 years later—and perhaps add your own twist.
Related Articles
- Social Networking Online: How Memory Shapes a Shift from Content to Connections
- 8 Essential Insights into RF Coexistence Testing for Shared Spectrum
- Hands-Free Work Lights: Ditch the Flashlight and Work Smarter
- Microsoft and Coursera Launch 11 New Professional Certificates to Bridge AI and Tech Skills Gap
- Understanding Reward Hacking in Reinforcement Learning for AI Systems
- Key Highlights from AWS 'What's Next' Event: AI Agents Redefining Business Operations
- 7 Must-Try View Transition Techniques for Modern Websites
- New Framework Reveals How Design Managers and Lead Designers Can Thrive Through Shared Leadership